Intro to Outdoor Climbing
Welcome to Lesson 4 of your outdoor rock climbing journey! You’ve explored the ethics of outdoor climbing, gear essentials, and the figure-eight knot. Now, it’s time to master belaying with a Petzl GriGri, an assisted-braking device that adds safety for Top Rope climbing. You’ll learn the “PLUS” or “PBUS” technique and get a basic introduction to anchor awareness (without building them yet). Let’s make you a confident belayer!
Top Rope Belaying with a Petzl GriGri: Step-by-Step
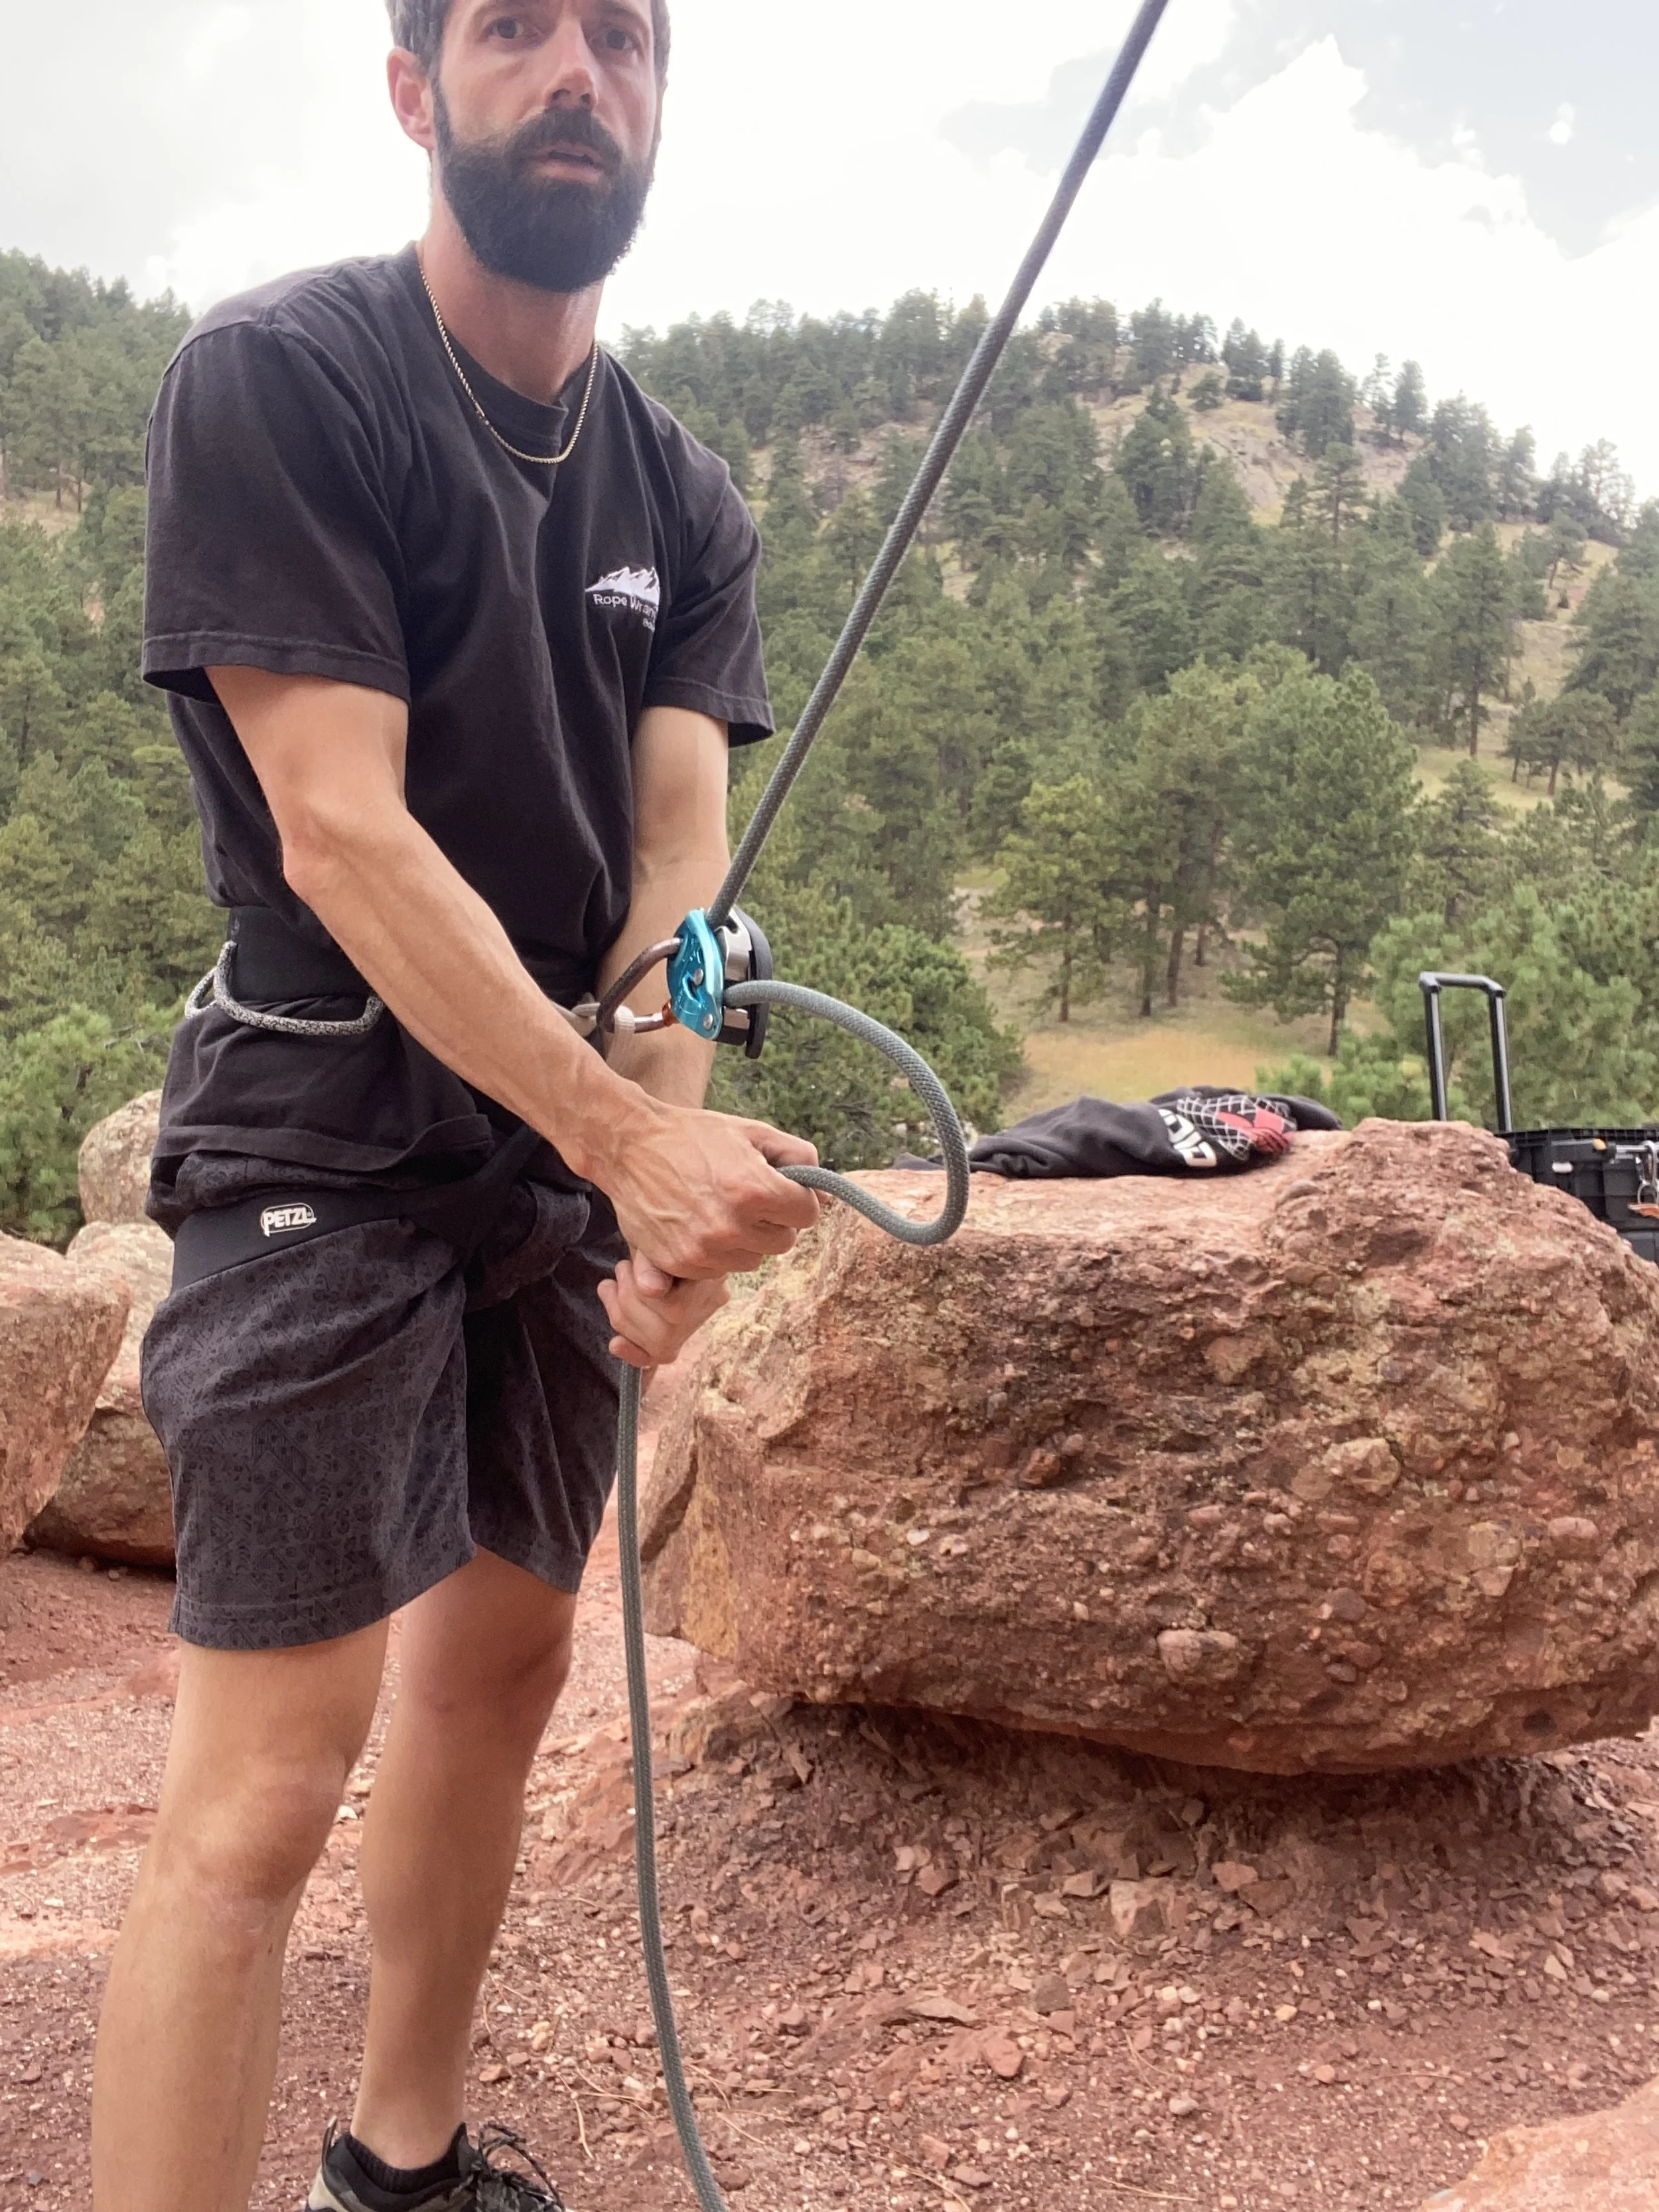
Belaying means managing the rope to catch your climber if they fall or rest. The Petzl GriGri’s assisted-braking mechanism assist but is not an automatic locking device. Proper technique is critical. Here’s how to belay using the PLUS/PBUS technique (1.Pull, 2.Lower (Brake), 3.Under, 4.Slide):
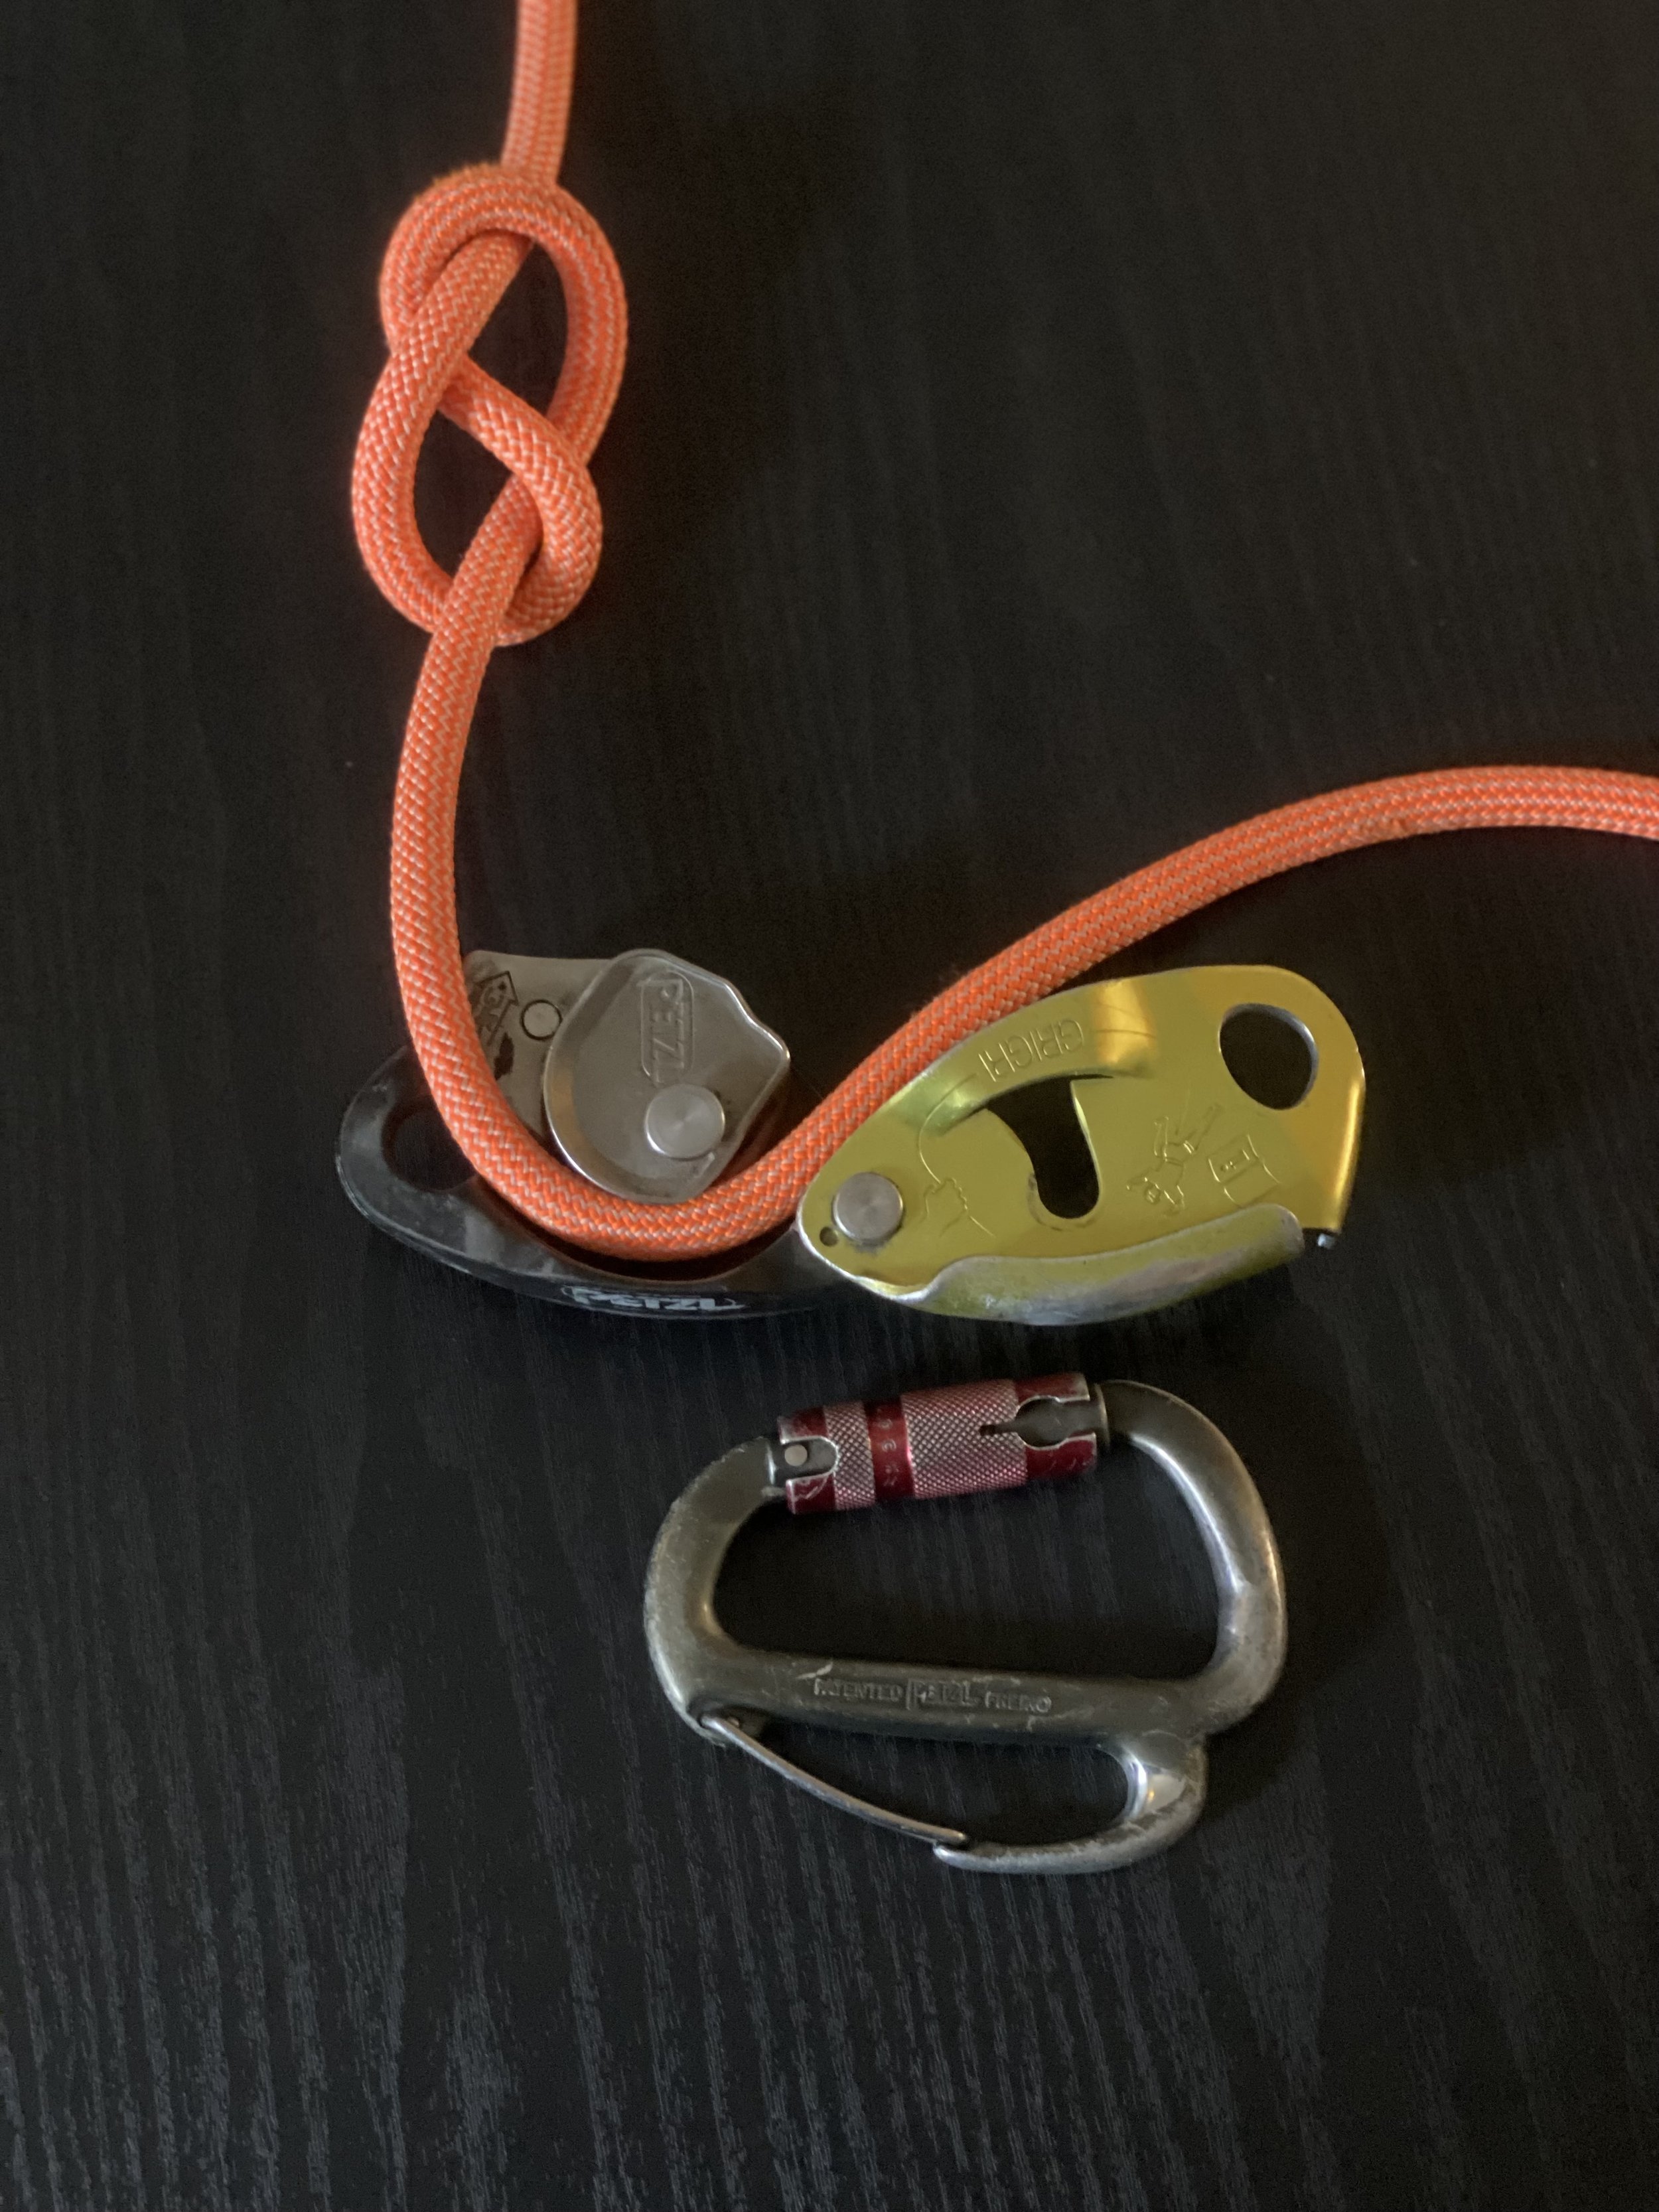
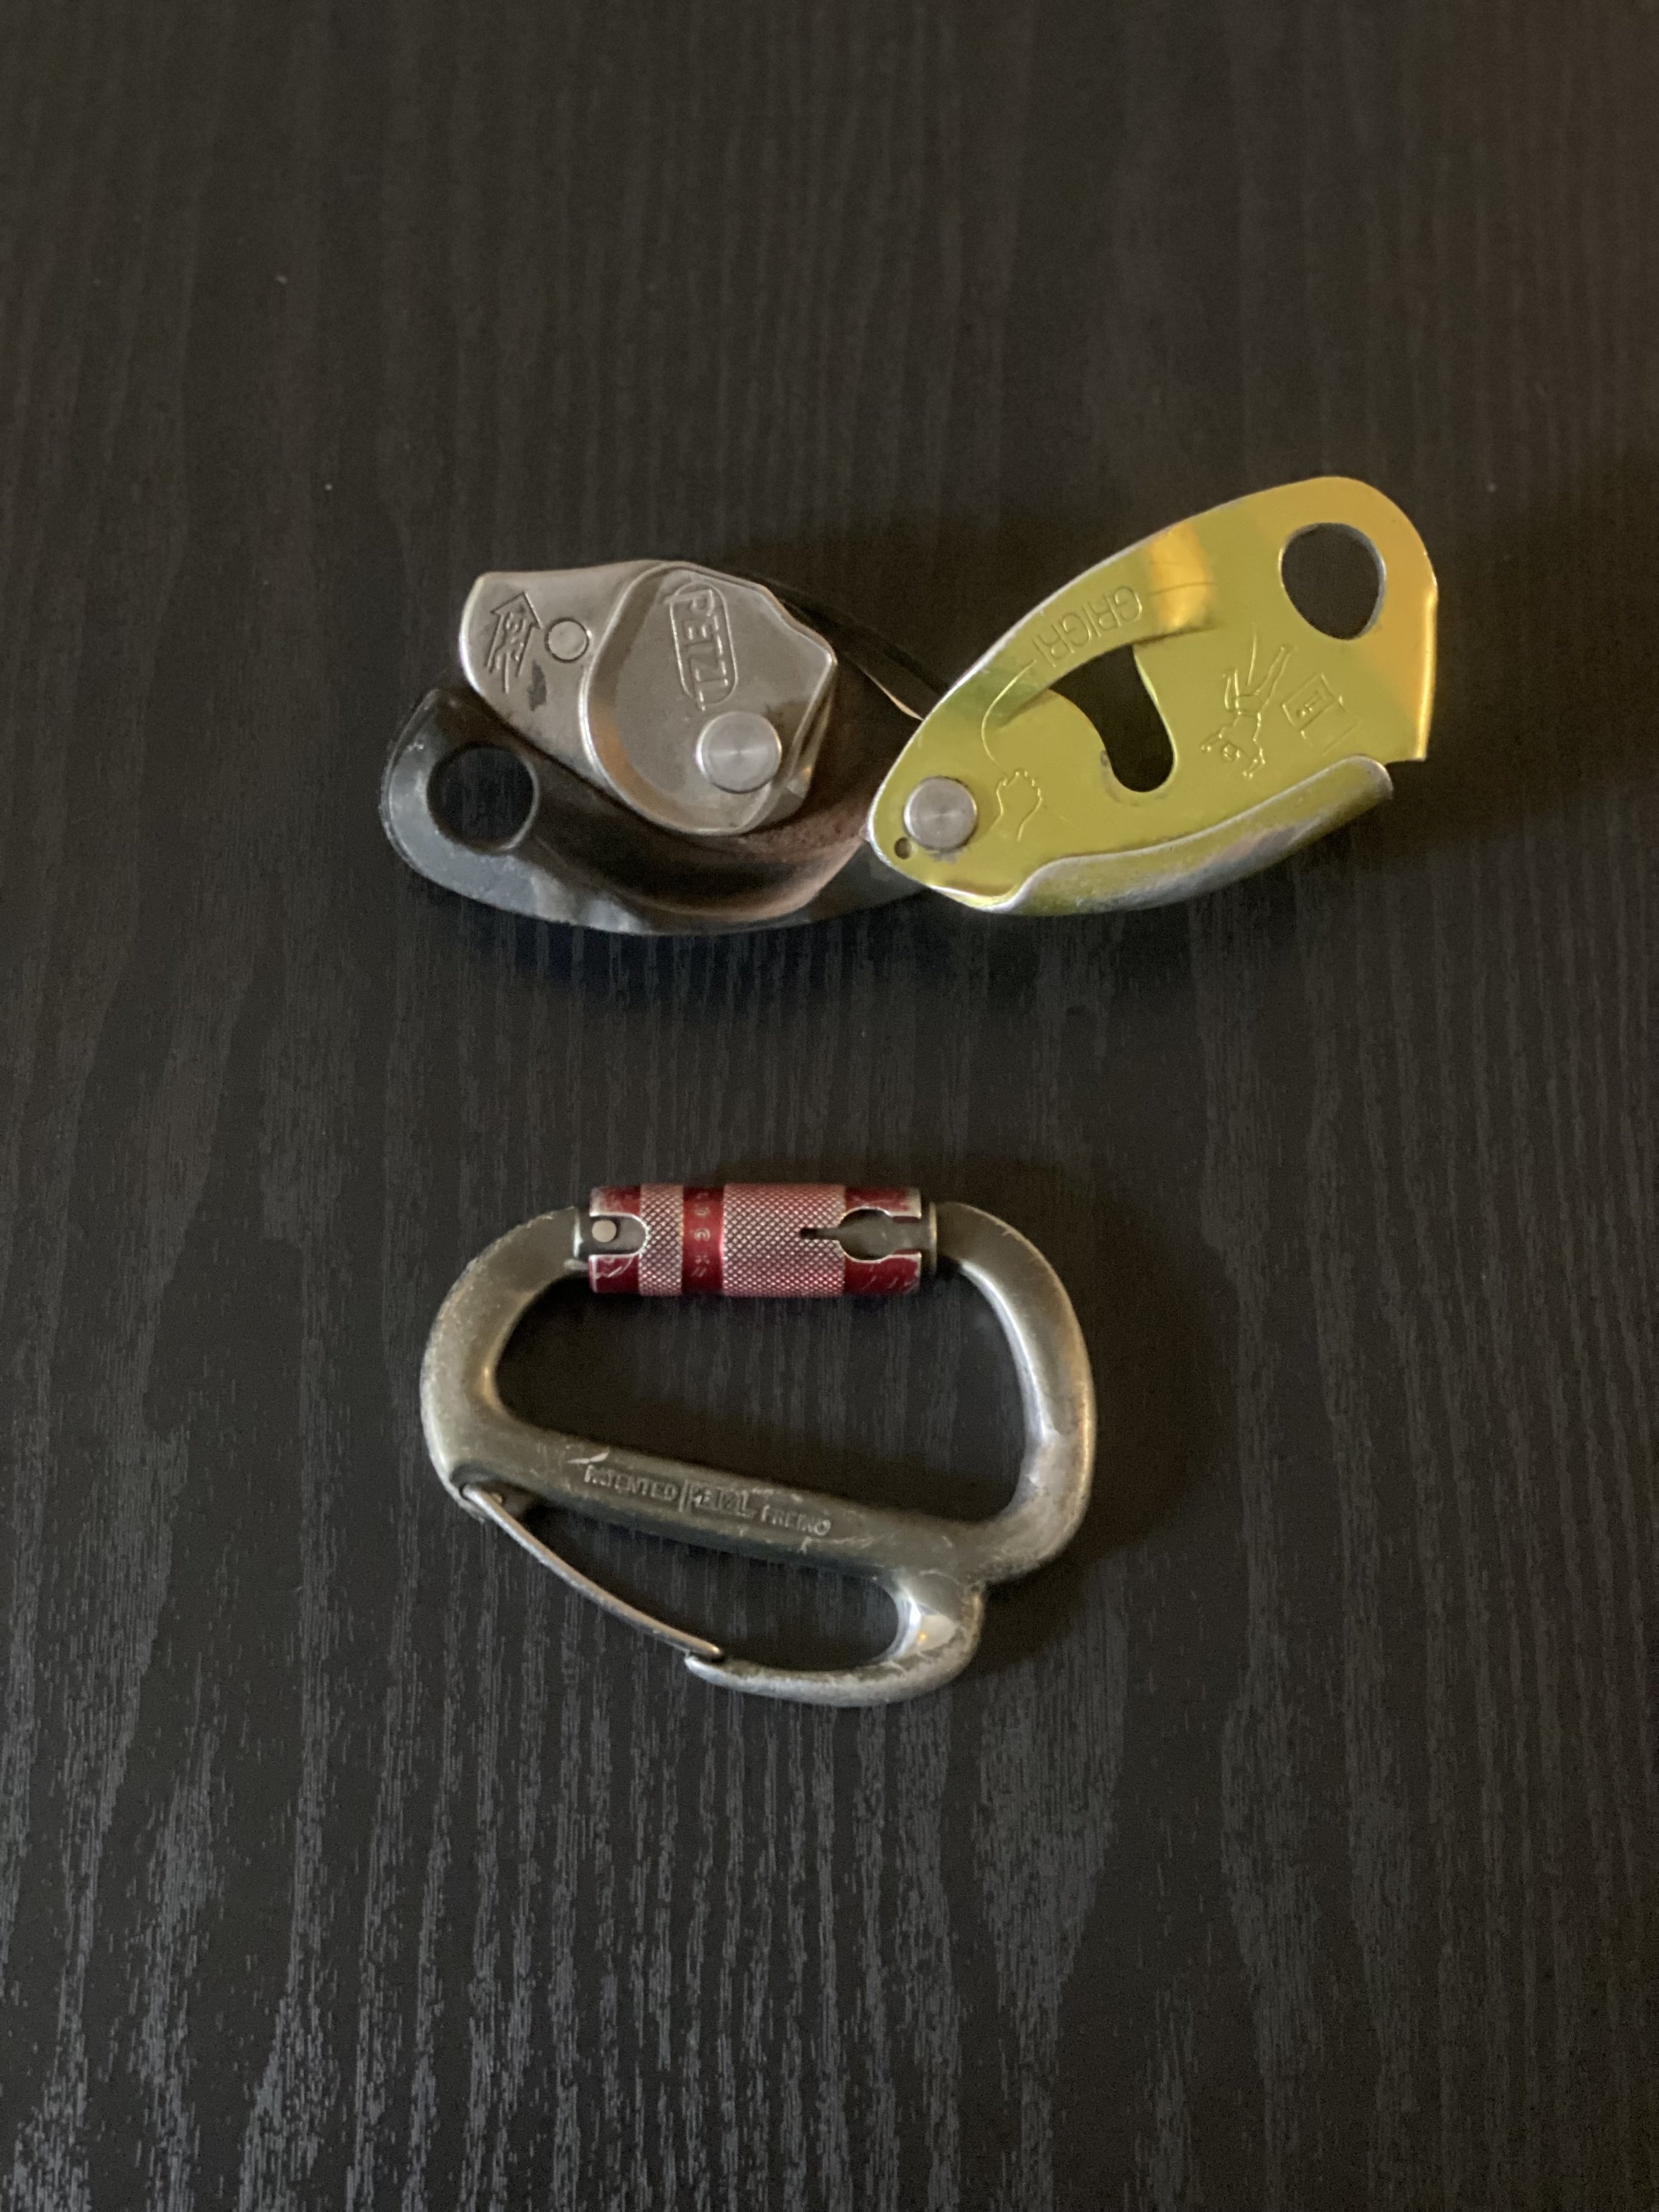
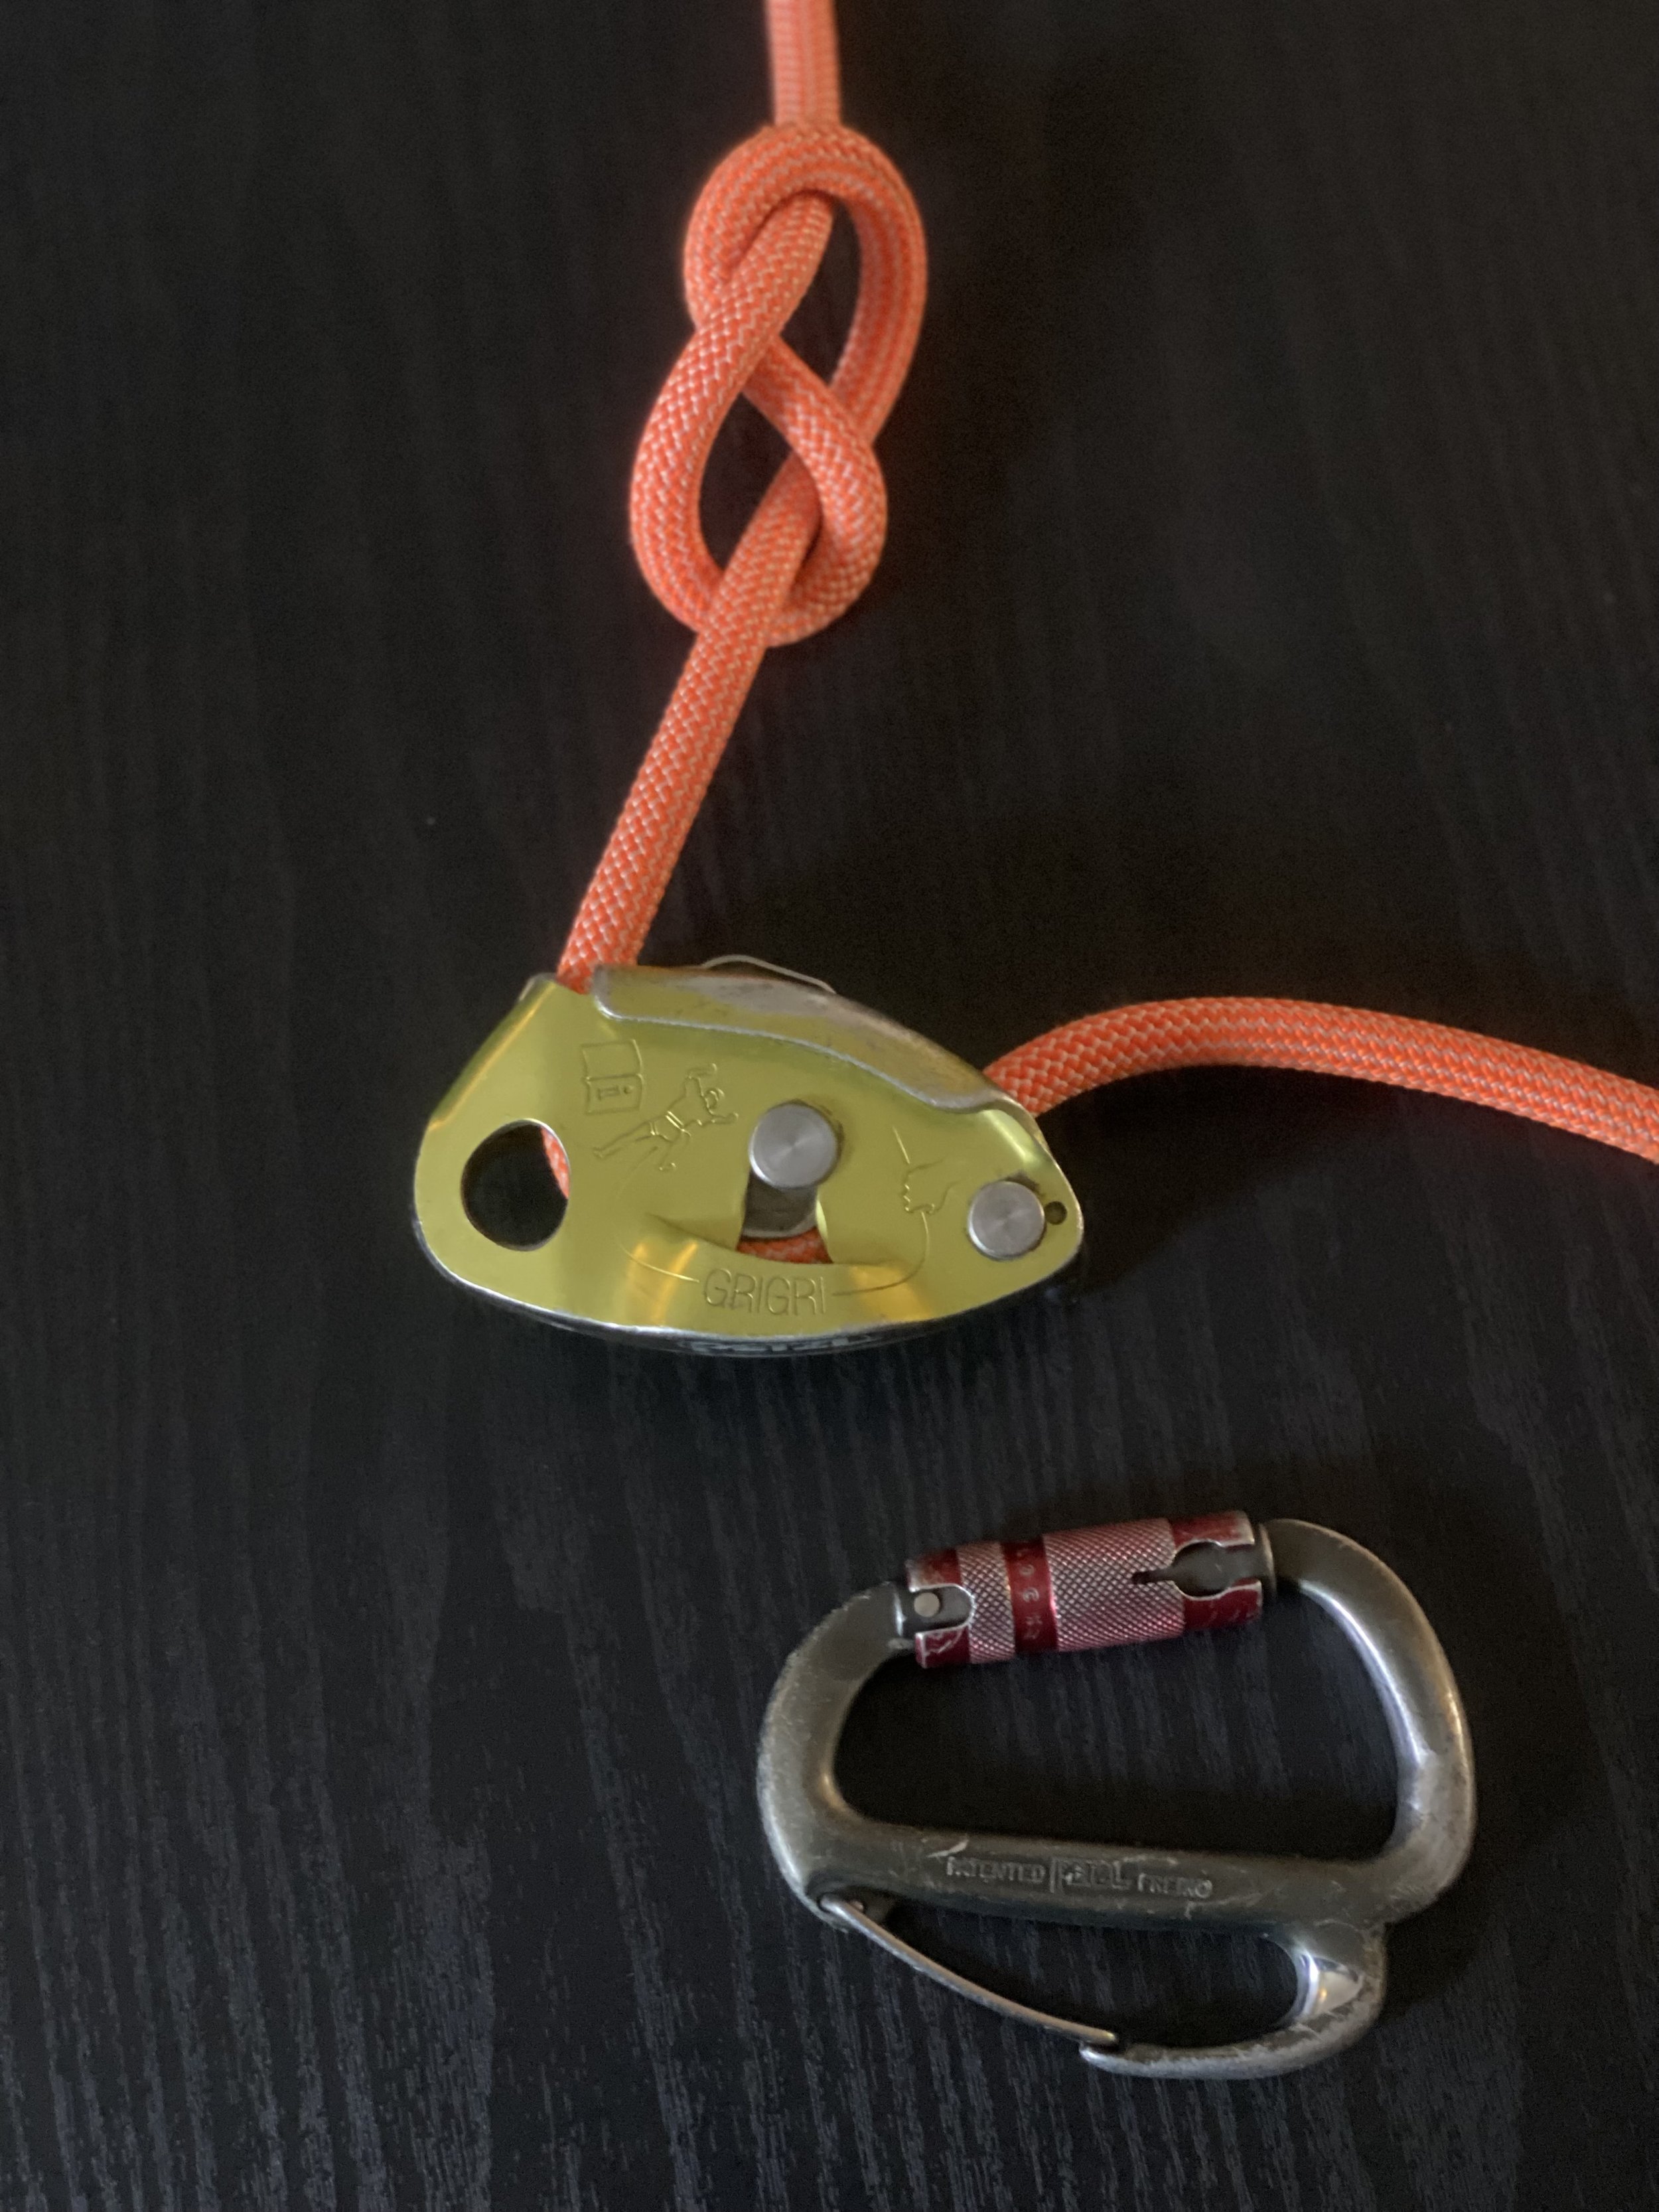
Set Up the Petzl GriGri:
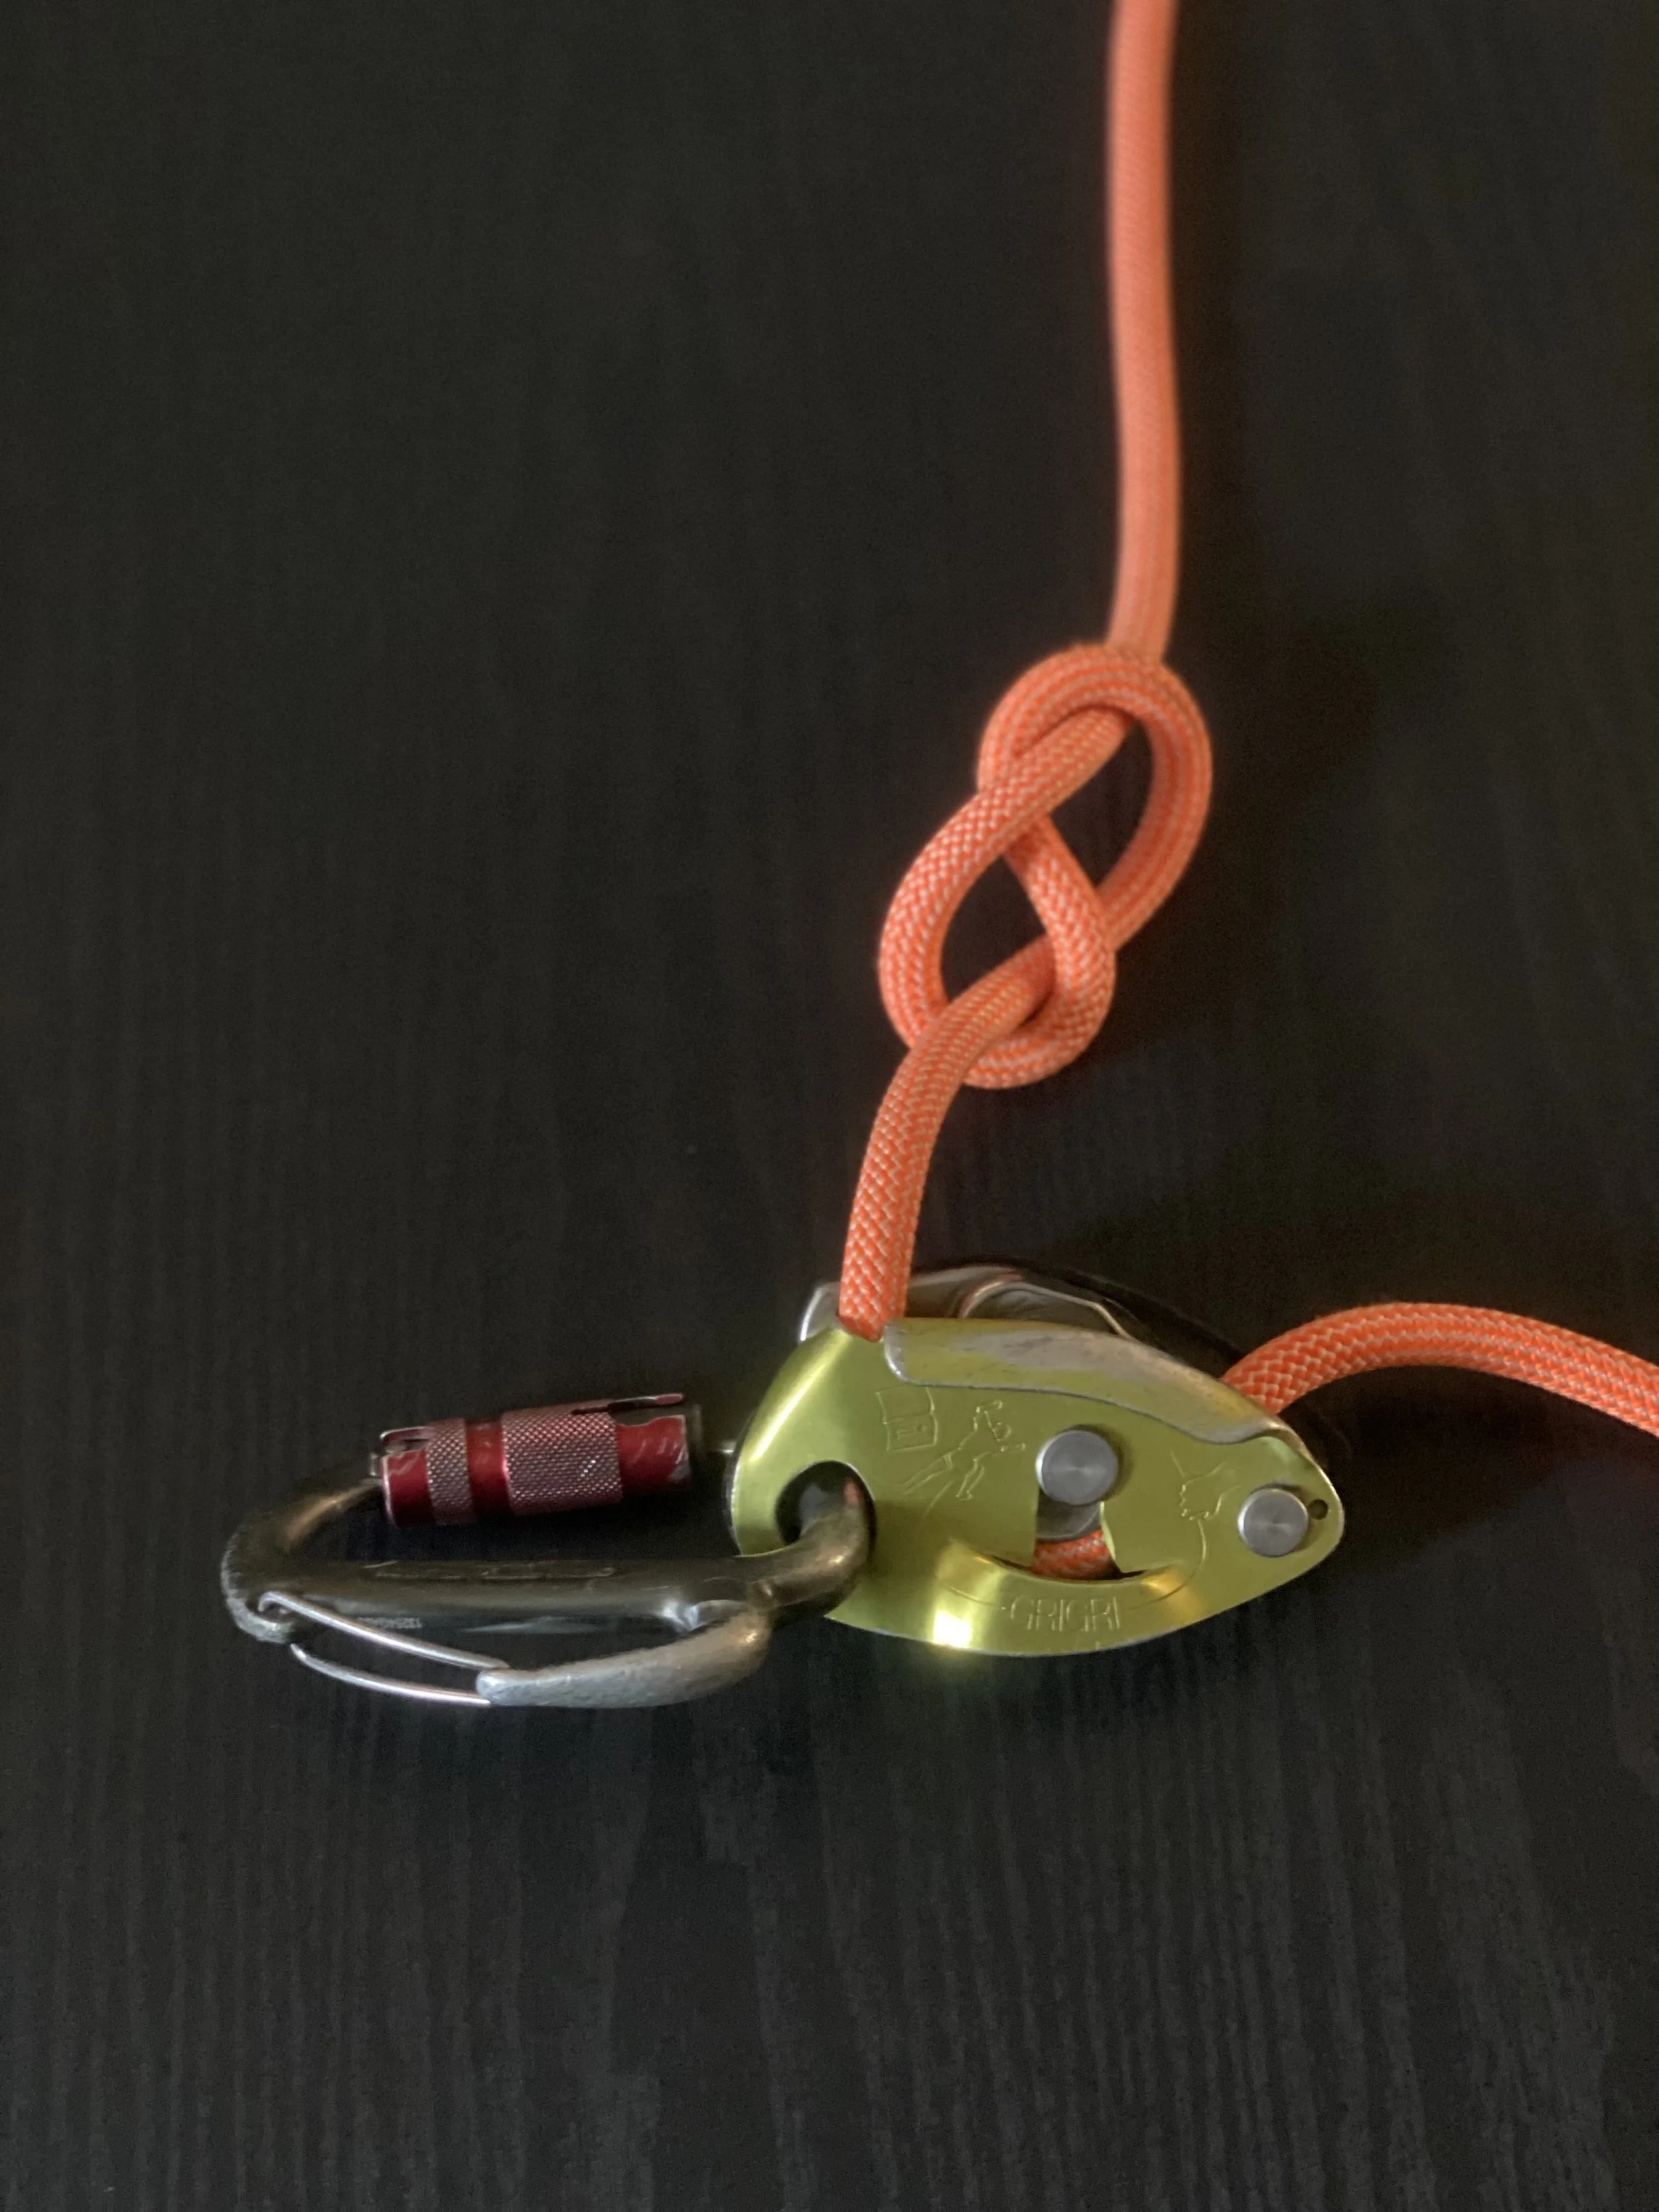
Open the GriGri’s colored faceplate and locate a picture of a climber and directional arrow.
Insert the rope following the engraved pictured diagram on the GriGri’s side (climber’s side of the rope goes in the direction of the arrow pointing up).
Ensure the rope is seated correctly in the cam and channel, with no twists, and close the colored face plate.
Clip the GriGri to a locking carabiner, then attach the locking carabiner to your harness’s belay loop. Lock the carabiner.
ensure the Grigri’s lever is on the left side and the ropes are pointing upwards with no twist.
Safety Note: Confirm the rope diameter is compatible (8.5–11 mm, check your GriGri’s manual).
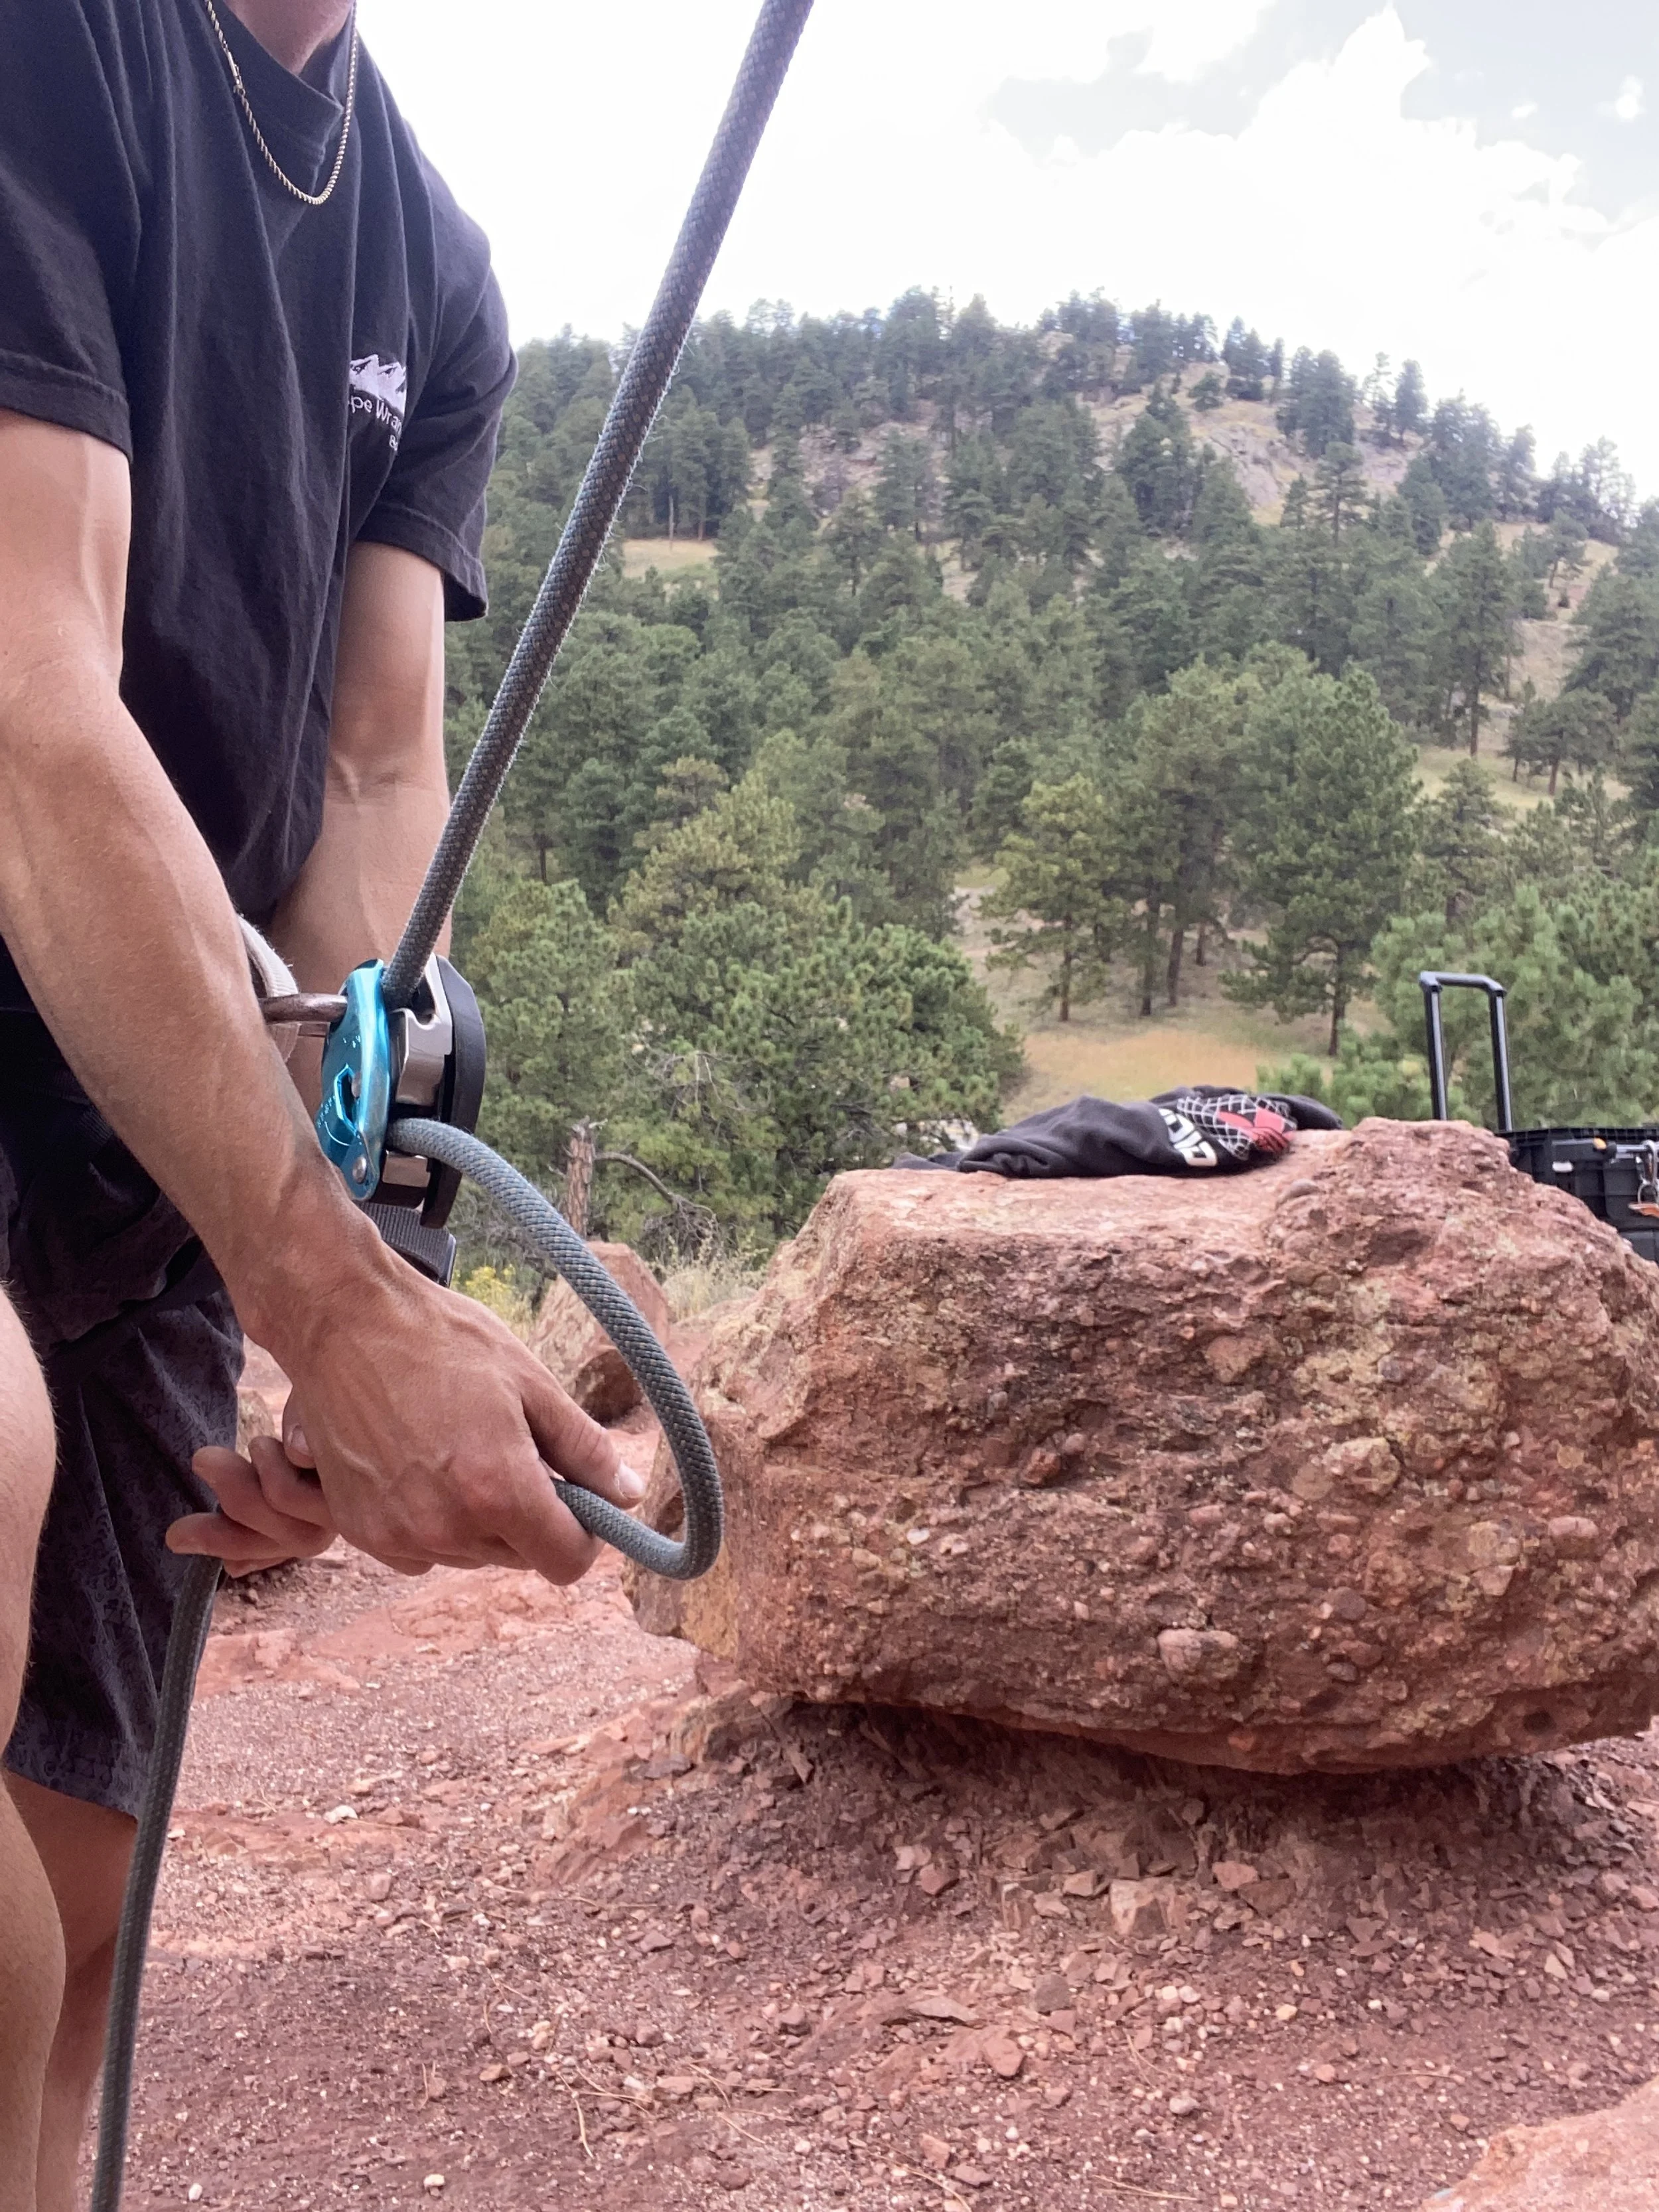
Position Yourself:
Stand directly below the top rope anchor, facing the wall, with athletic stance for stability.
Keep minimal slack in the rope to allow climber movement, but avoid excess slack to minimize fall distance. The GriGri’s cam helps catch falls, but proper positioning is key.
Safety Note: Always keep your brake hand on the rope’s free end (below the GriGri), as the assisted-braking isn’t foolproof.
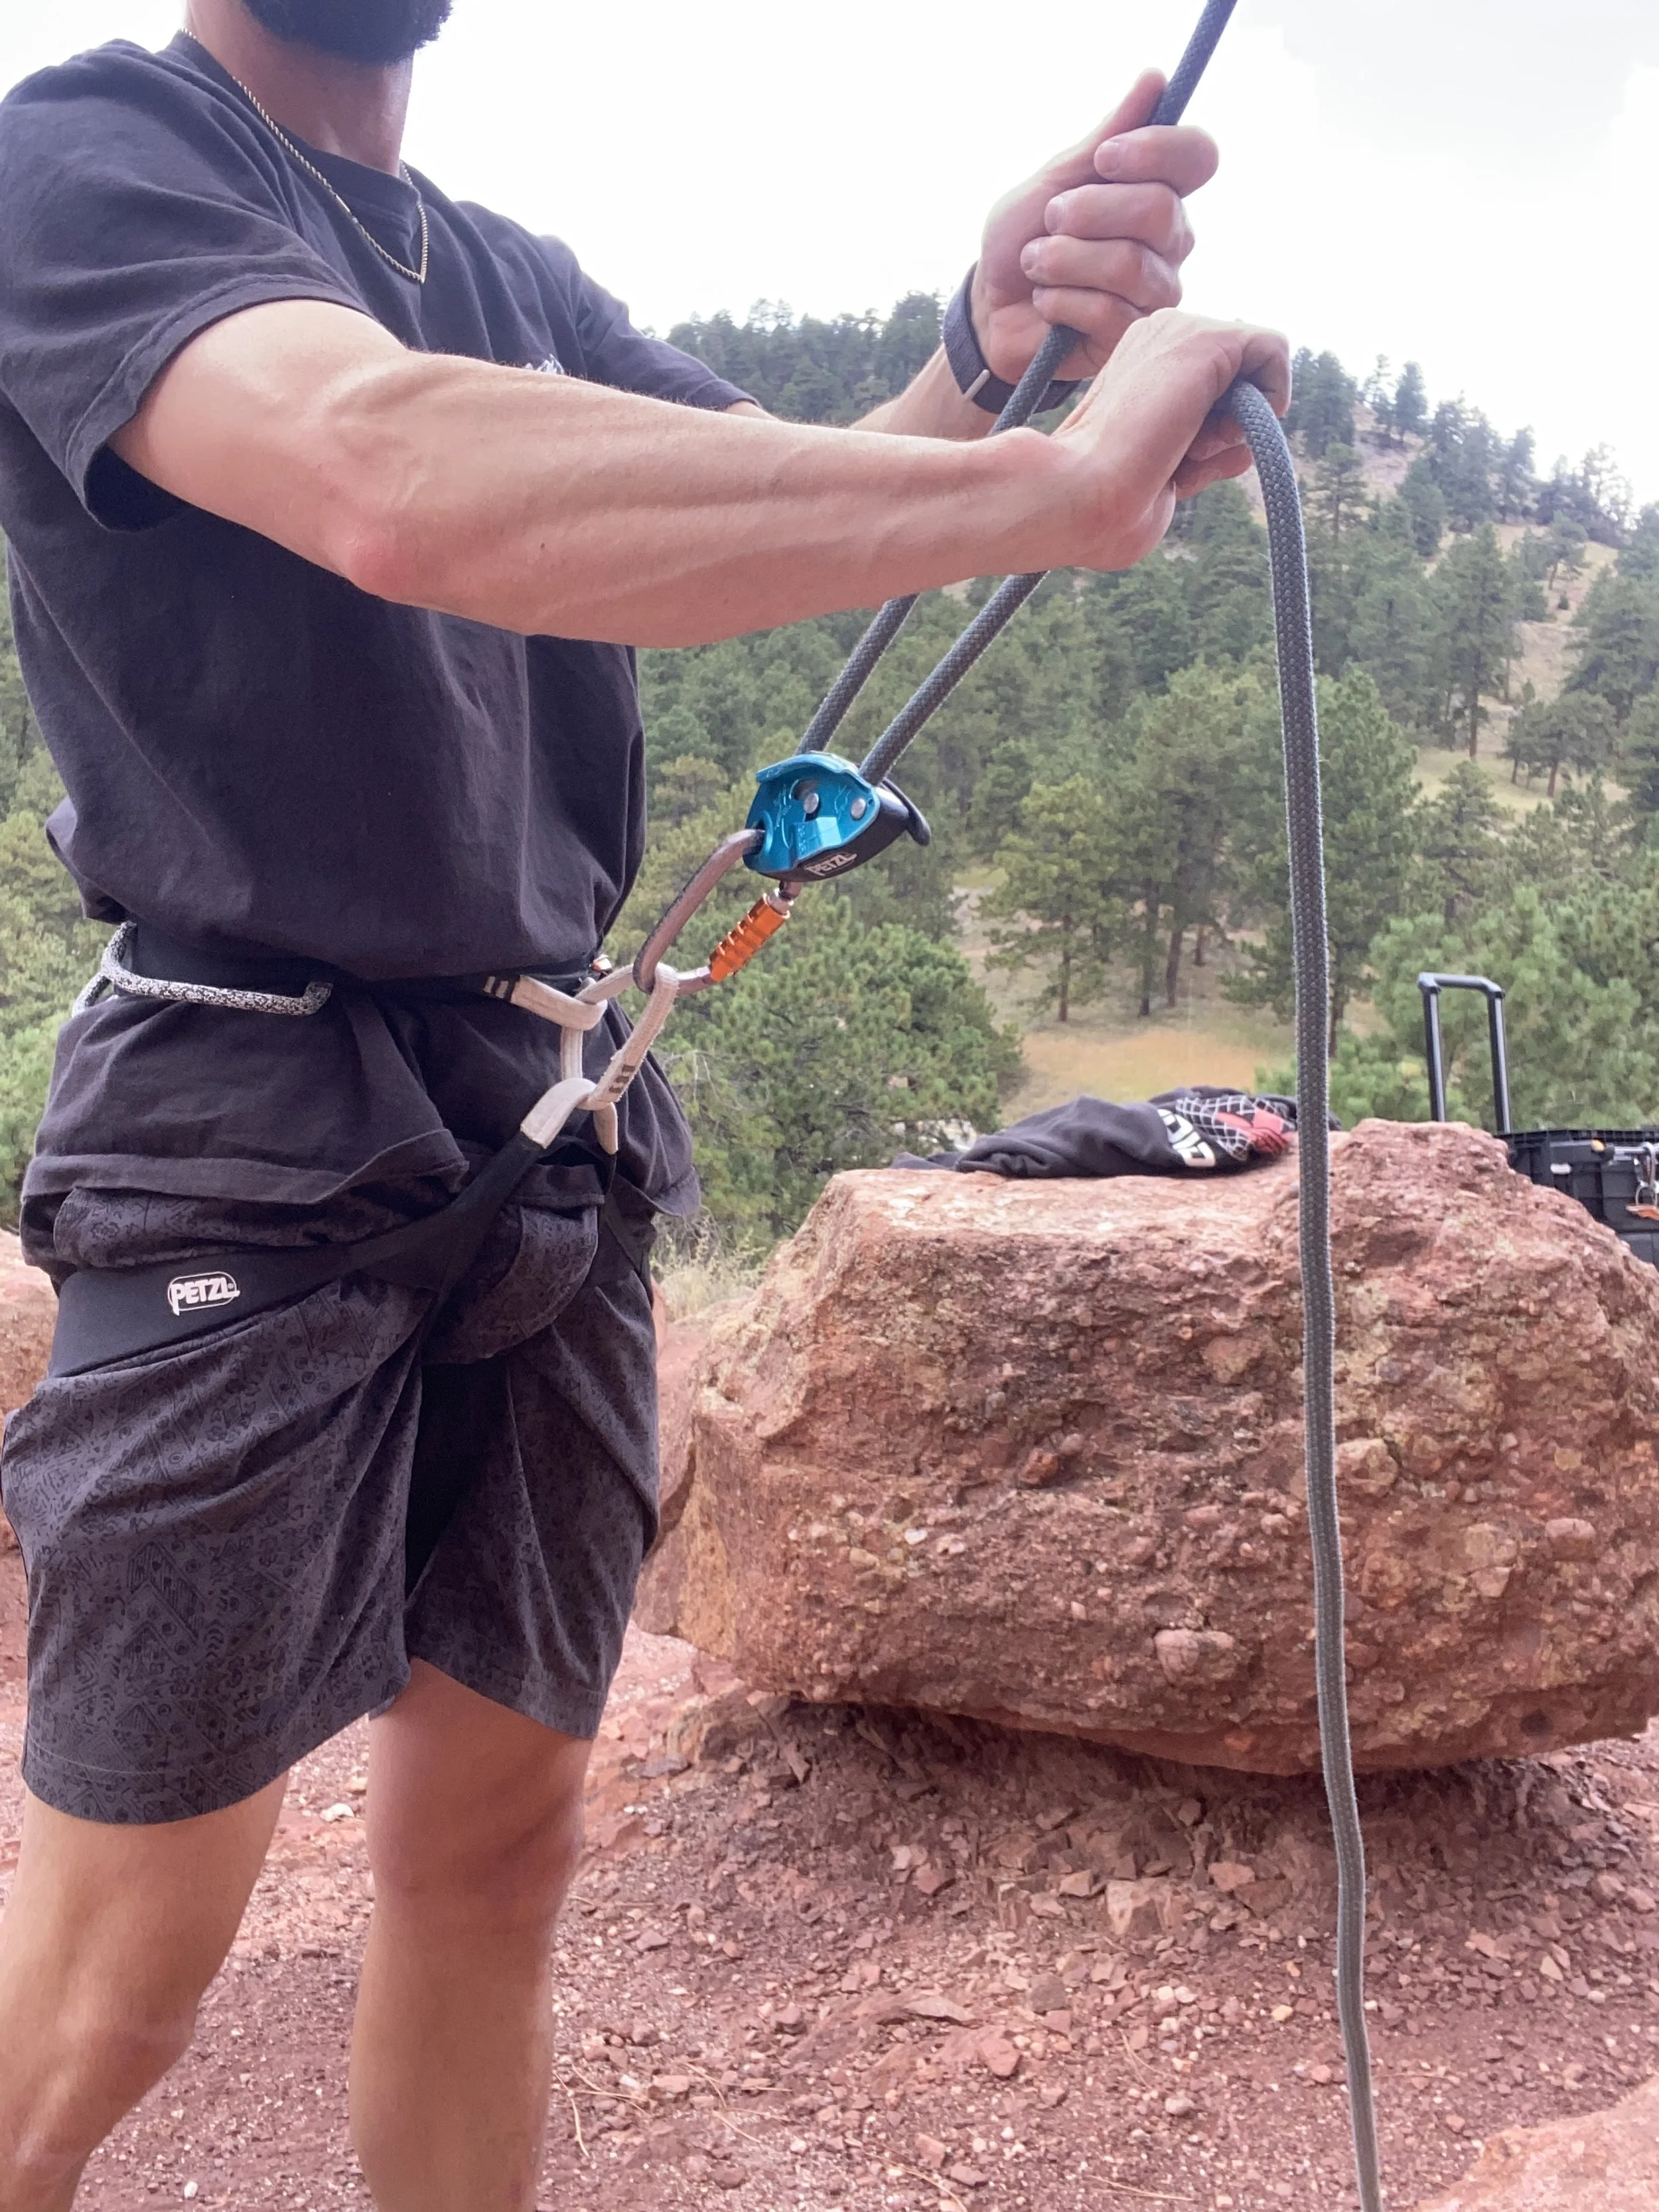
PLUS & PBUS Technique:
Pull: With your guide hand (above the GriGri, holding the climber’s rope), pull rope through the device as the climber ascends.
Lower / Brake: With your brake hand (below the GriGri, holding the free end), move the rope downward to the brake position to lock the device if needed. Never let go of the brake hand.
Under: Move your guide hand below the GriGri to grip the rope next to your brake hand.
Slide: Slide your brake hand up the rope, keeping it in the brake position, to prepare for the next pull.
Repeat smoothly to take in rope as the climber moves.
Safety Note: If the climber falls or rests, the GriGri’s cam engages automatically. Reinforce by pulling the brake strand down to ensure it locks.
Lowering the Climber:
Hold the brake strand firmly with your brake hand.
Gently pull the GriGri’s lever with your other hand to release the cam, feeding the rope slowly.
Control the speed with the handle and brake hand for a smooth, safe descent.
Safety Note: Keep your brake hand on the rope at all times during lowering.
Safety Note: The GriGri’s assisted-braking feature enhances safety but doesn’t replace proper technique. Always keep your brake hand on the rope, and stay focused.

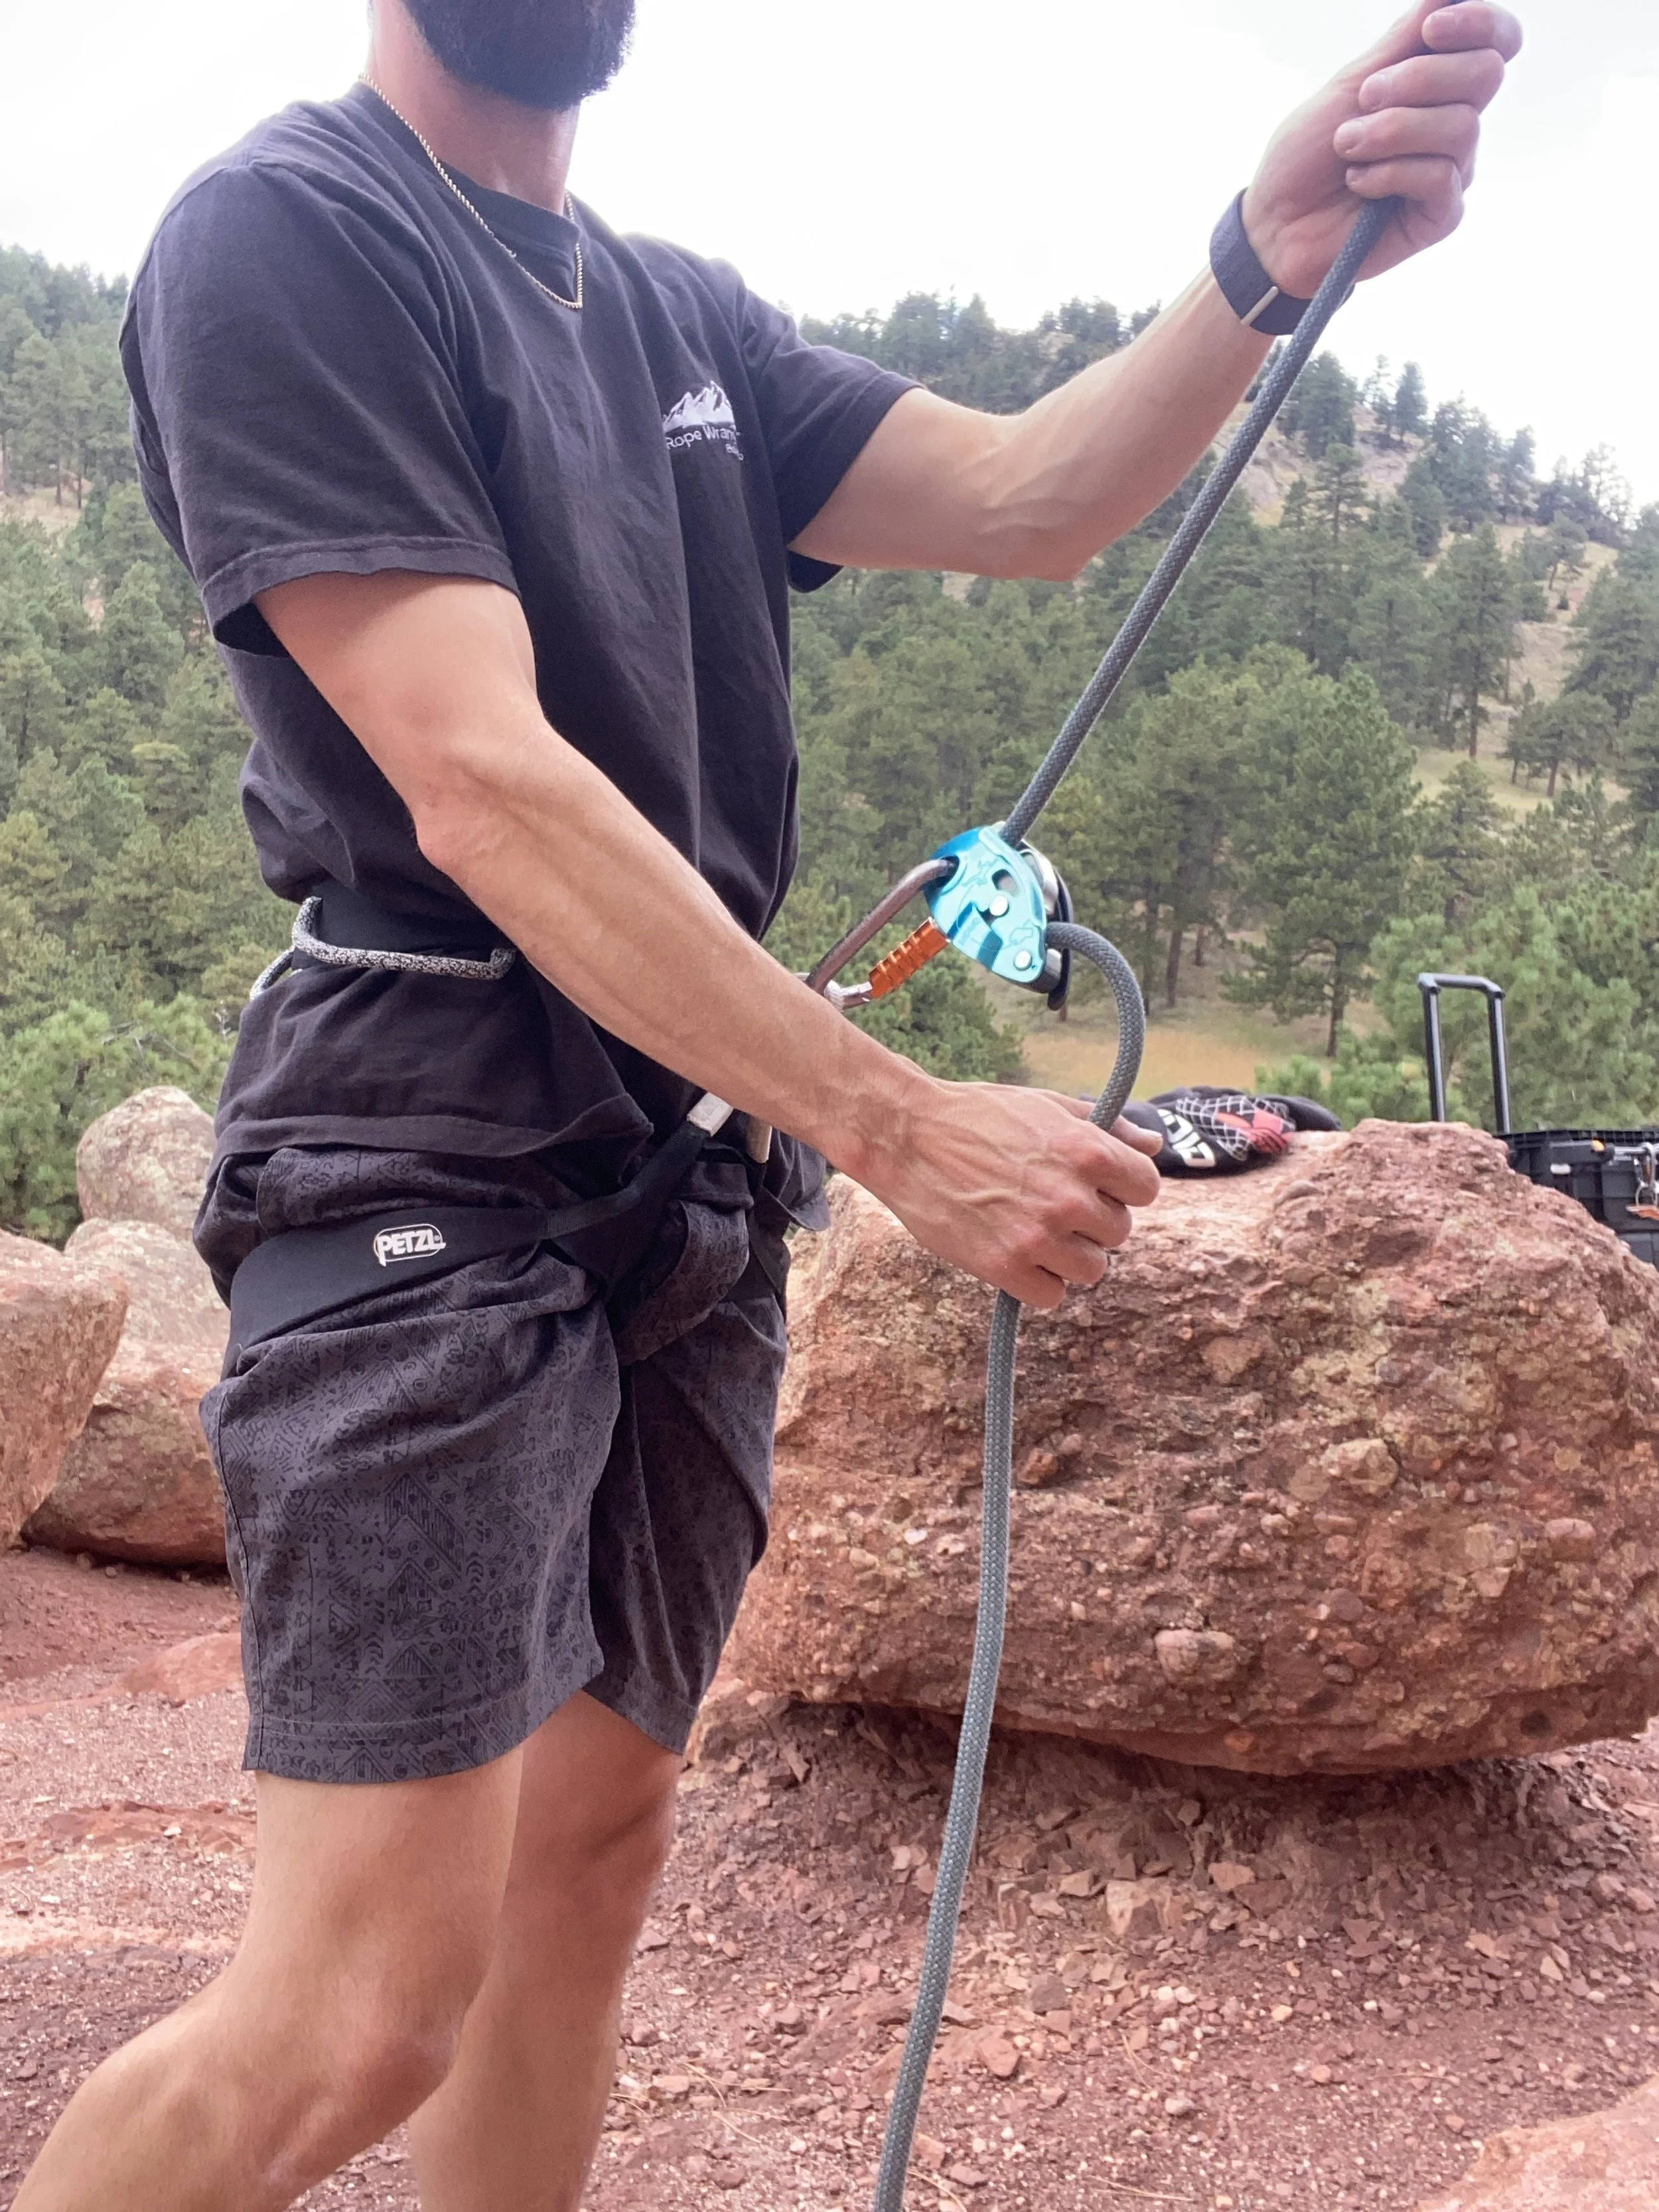
Starting Postion
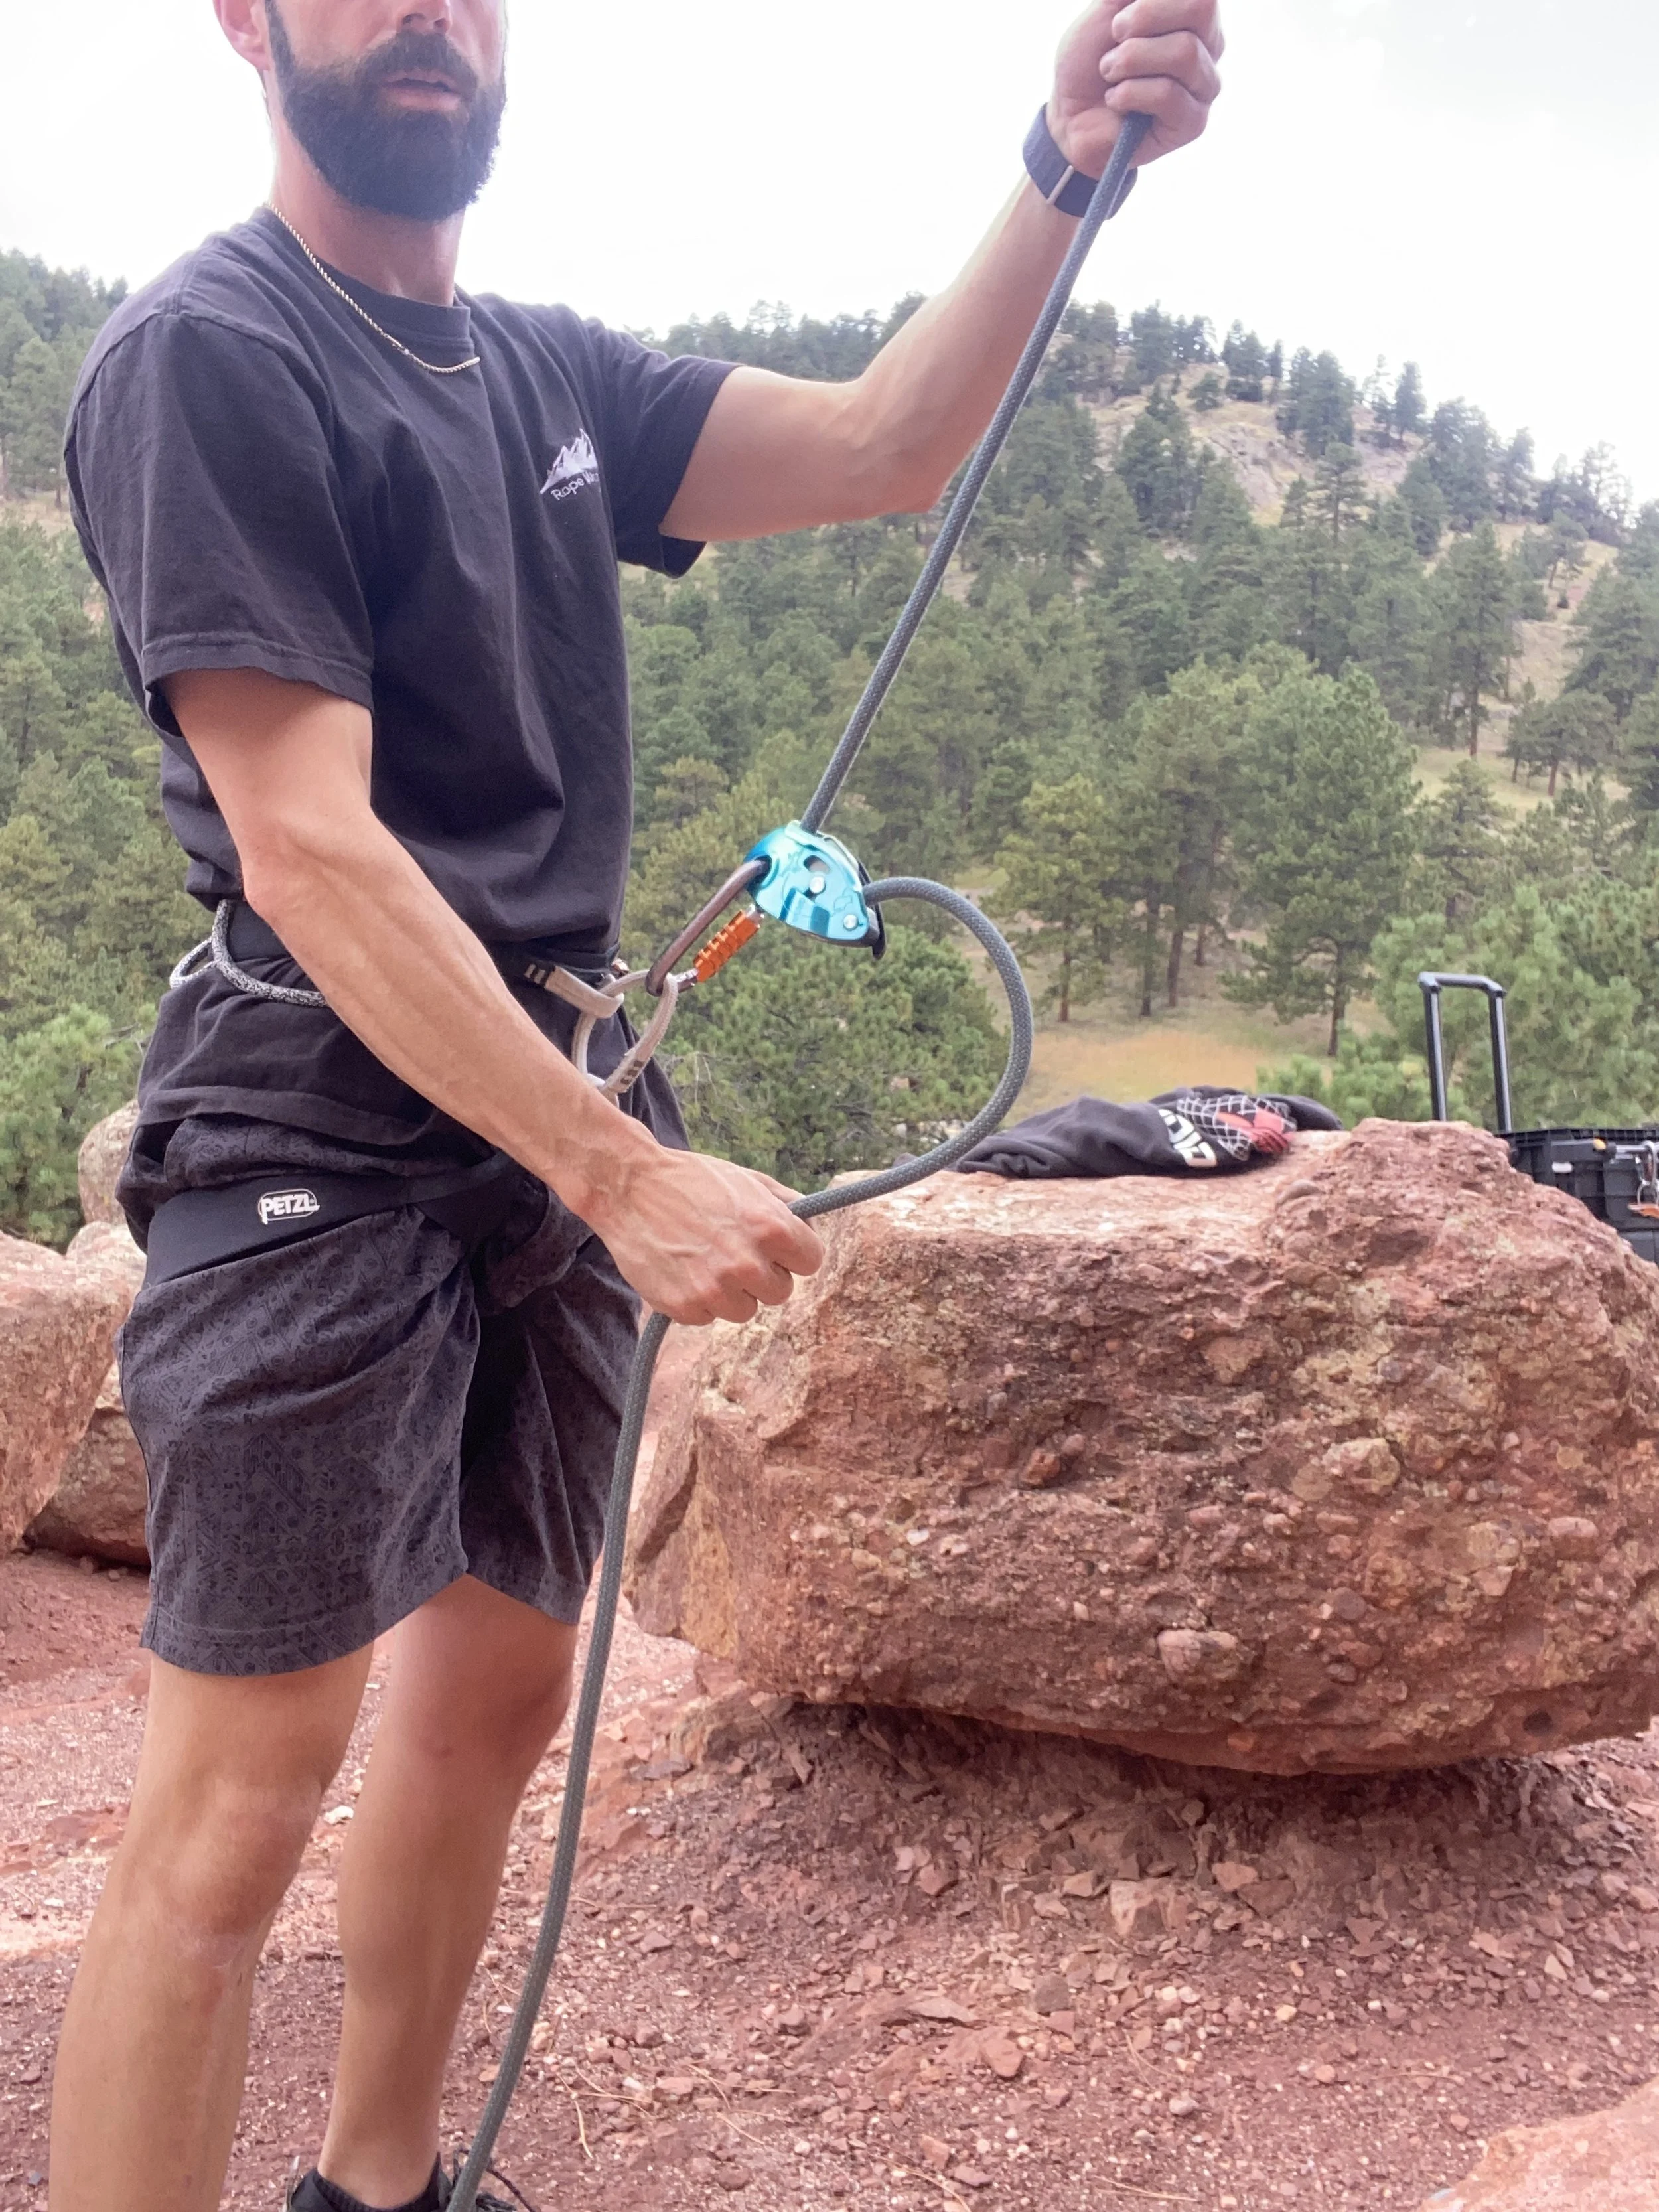
2. Lower Brake hand into “brake” position
3. Bring Guide hand to grab the rope under your brake hand.

4. Slide your brake hand up the brake strand of the rope to the grigri.
Reset
Pull up with brake hand and down with guide hand
Anchor Awareness (Basic)
Anchors secure the rope at the top of a top rope climb. As a beginner, you won’t build anchors yet (we’ll cover that in a later lesson), but you need to spot a safe one:
What to Look For:
Bolts: Check for solid, non-rusted bolts (usually two) with chains or quickdraws. Avoid loose or heavily corroded bolts.
Natural Features: Trees or rocks should be sturdy (e.g., live trees at least 6 inches thick, not dead or wobbly).
Slings/Webbing: Look for no fraying, fading, or cuts. If worn, don’t use the anchor.
Redundancy: Safe anchors have at least two strong points (e.g., two bolts or a bolt and tree) for redundancy.
Equalization: The anchor should distribute the climber’s weight evenly across points to avoid overloading one.
What to Do: Use pre-set anchors at beginner-friendly crags. If anything looks off, ask an experienced climber or guide to verify.
Safety Note: Never climb on an anchor you don’t trust. When in doubt, seek expert advice.
Practical Exercise: Belay Practice & Anchor Inspection
Challenge: Visit a climbing gym or pair with an experienced belayer to practice top rope belaying with a Petzl GriGri. Use the PLUS/PBUS technique to belay a climber through 3 cycles (climb, rest, lower). Focus on keeping your brake hand on the rope and smooth motions.
Anchor Observation: At a gym or beginner-friendly crag (with supervision), inspect a top rope anchor. Note if it has two points (e.g., bolts or slings) and if they look solid. Write down your observations and ask an experienced climber if it’s safe.
Reflection: Journal or discuss: How did belaying with the GriGri feel? Was the PLUS/PBUS technique smooth? What would boost your confidence?
Safety Practice: Watch a video on GriGri belaying (search “Petzl GriGri top rope belaying PBUS” on YouTube) and note one tip to improve your technique.